Tuesday, March 15, 2011

Shrimp Scampi

My dining room is kind of small and eight people seem to fit just right – more than eight and I start thinking “get some help to serve and clean.” But I like to do things by myself and, as you will see, this dish allows me to “show off,” yet spend more time with my guests than in the kitchen.
I am amazed at how differently various restaurants prepare their “shrimp scampi.” I’ve tried numerous variations. After countless efforts, I suggest the following, which can be prepared well in advance, giving you a chance to share most of the pre-dinner cocktail hour with your guests.
To begin, you need jumbo shrimp—an oxymoron, if I’ve ever heard one. In New Orleans, where I lived for four years, you can get fresh shrimp with their heads on. But up north here, virtually all shrimp available to us are farm raised and frozen before market. Choose unshelled shrimp 16-20 per pound. Smaller shrimp than that will not do.
The most difficult part of this dish is preparing the shrimp. In order to expose most of the meat, turn the shrimp so that the underside is toward you.  With a small paring knife, slice the shrimp from end to end without cutting through the shell. Leave the legs on. Using your thumbs, push the shell on the top side so that the meat is exposed and the shrimp is bent slightly at the middle. The effort will be worth it.
In a medium saucepan, over low heat, melt butter and olive oil. I use a half cup of butter and a half cup of olive oil, but you can adjust the combination to suit your taste as long as it equals one cup. Next add the garlic, lemon juice, dry mustard, Worcestershire Sauce, red pepper, spices, salt and minced parsley. Mix ingredients well, simmer for three to five minutes and turn off heat.
When cooled, dip each shrimp in the mixture and arrange on a foil-lined baking sheet.
Next, add a half cup of white wine to the saucepan, bring to a boil and simmer for 10 minutes or so. Spoon the contents over the shrimp. Be sure to distribute all the spices and garlic over the shrimp. This can all be done a day in advance. Cover it and place in the refrigerator until ready to cook.
Before serving, heat oven to 400 degrees and bring a large pot of slightly salted water to a boil.
About 15 minutes before your guests are seated at the table, put the shrimp in the oven for eight to 10 minutes, depending on the size of your shrimp. Put your linguini in the boiling water for nine minutes for “al dente.”
Drain the pasta and put a small mound on each plate. Arrange the shrimp on the pasta, spoon remaining sauce over the shrimp.
Add a nice Caesar salad, some crusty bread, a bottle of Chianti and some nice Andrea Bocelli music in the background and you are ready to dine at home—Italian style!

Ingredients for Shrimp Scampi
(serves eight)

Shrimp– depending on size, 5-8 shrimp per person—try 16-20/lb
3-4 tbsp. minced garlic
½ cup butter *
½ cup Extra Virgin Olive Oil *
          * (Use any combination of these two ingredients as long at it totals          one cup)
3 tbsp. lemon juice
1 tsp. dry mustard
2 tsp. Worcestershire Sauce
¼ generous tsp. crushed dried red pepper
1 tsp. fresh oregano *
1 tsp. fresh basil *
1 tsp. fresh tarragon *
          * (Note:  You can substitute dried spices or even a dried “Italian herb      seasoning,”           in which case you would use two teaspoons total of dried      herbs or generous three teaspoons of fresh ingredients.)
½ tsp. salt
3 tbsp. minced parsley
1 ½ pounds linguine

Monday, February 28, 2011

Sautéed Chicken with Almonds and Cherries

          It was a laid-back Sunday with plans to watch the Academy Awards that evening. My wife, Leslie, came home this week with a recipe from Weight Watchers for sautéed tilapia with almonds and cherries. It sounded like an interesting dish to try so I assembled the ingredients using substitutes for some.
          I keep certain basics in my freezer (i.e., shrimp, lamb chops, chicken pieces and fish), which make it convenient to produce those last-minute dinners. I took a nice 12 ounce piece of cod from the freezer, even though the recipe called for tilapia—a  easy substitute. I soaked a handful of dried cherries in warm water for a few minutes (the recipe called for fresh, but this is February, not July). And by pounding in a baggy, I chopped a half cup of almonds because I didn’t have the “sliced” variety.
          I defrosted the fish in a bowl of room temperature water for 20 minutes or so, only to discover that I had defrosted a nice boneless chicken breast by mistake!
          What do I do now? Keeping to my philosophy that anything you like to eat separately can be combined and eaten together, I changed the “fish” dish to a “chicken” meal. It turned out to be a tasty variation of the Weight Watchers recipe. Just slice the chicken breasts into medallions, approximately 4 to 6 ounces each. Heat 1 tablespoon of olive oil in a large nonstick sauté pan for two to three minutes. Cook the medallions for two minutes or so on each side until browned. Remove from pan and keep warm. Add one tablespoon of oil and next add the onions in the same pan. At the end, I added some chicken broth, instead of vegetable broth, to the sauce.
          I’ll bet this dish would work well with shrimp, too. But here’s the original recipe, courtesy of Weight Watchers – 4 points per serving.

Ingredients:
·        1 tbsp. sliced almonds
·        1 lb. raw tilapia, 4-oz. fillets (or try sole or flounder)
·        ¼ tsp. table salt
·        ¼ tsp. freshly ground black pepper
·        3 tsp. extra-virgin olive oil, divided
·        1 small onion, chopped
·        2 tbsp. dry white wine, or dry vermouth
·        ½ cup sweet cherries, pitted and halved (if using frozen cherries, thaw first)
·        ½ cup reduced-sodium, fat-free vegetable broth
·        ¼ tsp dried thyme

Directions:
1.     Toast the almonds in a large nonstick skillet set over medium-low heat until aromatic and golden, shaking the pan often, about four minutes. Transfer to a bowl.
2.     Season fish with salt and pepper. Heat 2 tsp. of oil in the skillet, and then add the fish. Cook until firm and lightly browned, about two minutes, then flip and cook about two more minutes. Remove fish to four serving plates.
3.     Heat remaining teaspoons of oil in the skillet, then add the onion. Cook until softened, about two minutes. Add wine or vermouth; loosen any browned bits on the bottom of the pan with a wooden spoon. Cook for 20 seconds, and then add cherries, broth, and thyme. Heat until simmering; cook for 30 seconds to reduce slightly, divide sauce and toasted almonds among the fish. Serve at once.

Sunday, February 13, 2011

Comfort Foods—Pot Roast, Tsimmes, Noodle Kugel

Thick ice on the roof, snow “flurries” that need shoveling and temperatures in single digits all signal that it’s time to warm your soul and return to some basic foods turning winter “blahs” into winter “aahs.”
My wife, Leslie, and I do not share many interests but small dinner parties at our home are something we enjoy doing as a team. Since our kitchen is rather small, it requires us to carefully plan our cooking time so that we each have the kitchen to ourselves. Two people working in a small space can lead to problems, so this month’s column combines several dishes that can be prepared in advance and reheated just before serving.
Recently, we had a small gathering of old friends for dinner. Leslie and I served a meal that I describe as “Jewish comfort food,” although pot roast is not just an exclusive ethnic dish. Some recipes call for cooking the meat in a 350° oven, but I prefer slow cooking on top of the stove which fills my home with wonderful aromas. The combination of brisket, tsimmes and noodle kugel sounds a little heavy, but on a cold winter night, it seemed just right. The brisket is cooked the day before and actually tastes better when reheated the next day.

Pot Roast with Garlic and Prunes
Ingredients:
·        4-5 lbs. brisket, trimmed of fat
·        1 lb. carrots, peeled and cut in 1-inch chunks
·        5-6 stalks celery, chopped in 1-inch chunks
·        5 cloves garlic, peeled and smashed
·        2 medium onions, cut into wedges
·        ¼ cup ketchup
·        Vegetable oil
·        Salt and pepper to taste
·        2 cups beef broth—I prefer using beef bouillon cubes
·        1 cup red wine
·        1 dozen pitted prunes
·        2 tbsp. plus 1 tsp. balsamic vinegar
·        ¾ cup port wine

Season de-fatted brisket with salt and pepper and brush ketchup on both sides of meat.
Place 2 tbsp. vegetable oil in a large heavy pot and heat (medium high) for two minutes.
Brown meat in pot approximately 3 minutes per side. If meat is too large to fit into the pot, cut brisket in half so that the meat can be browned. Remove meat and add carrots, celery, garlic and onions and cook for about 5 minutes to soften vegetables. Add a little beef broth and scrape bottom of pot to release the brown bits. Place meat on top of vegetables and add rest of broth, wine and enough water to barely cover the meat.
Bring mixture to a boil, reduce heat to simmer and cover pot tightly with lid. I use a layer of aluminum foil between the pot and its cover, which creates a nice tight seal.
Cook meat about 3-3½ hours until meat is quite soft. I turn the meat over once during cooking and spoon vegetables over meat to finish. When done, remove meat, let it cool and wrap tightly in aluminum foil.
In a small sauce pan, bring vinegar and port wine to a boil over medium-high heat. Reduce heat and simmer for 10 minutes.
Place cooked vegetables, juices and garlic and six prunes in a blender and puree until smooth.
Add vinegar/wine mixture to puree and add six remaining prunes.  Bring to boil, reduce heat and simmer for 10 minutes. 
When cool, the meat and the gravy can be kept in the refrigerator overnight. When ready to serve, simply re-heat meat and gravy in the same pot. When warm, remove meat, slice across the grain, and add some sauce on top.

Vegetable and Dried Fruit Tsimmes
Ingredients:
·        10 large carrots, peeled and cut into 1-inch chunks
·        2 lbs. sweet potatoes, peeled and cut into 1-inch chunks
·        ½ cup pitted prunes
·        ½ cup light raisins
·        ¼ cup honey
·        ¼ tsp. cinnamon
·        ¼ tsp. nutmeg
·        grated orange peel from one orange
·        1 cup orange juice
·        1 tbsp. butter or margarine

Cook carrots and sweet potatoes in boiling water for 10 minutes, until barely tender. Drain liquid. Combine with all the remaining ingredients except butter. Turn the mixture into a shallow 3-quart baking dish. Dot with butter. Bake for 30 minutes in 350° oven until brown.

Grandma Sarah’s Noodle Kugel
(Note from Leslie: This recipe is from my life-long friend, Susan, who lives in my hometown of Baltimore. Susan adapted it from her grandmother to accommodate a healthier approach to food. I’ve been making it for years and every time I make it, I get raves from my guests.)
In a mixing bowl, combine:
·        4 eggbeaters
·        1 egg
·        1 tbsp. vanilla
·        ¾ cup sugar (you can also use ½ cup sugar and ¼ cup Splenda)
·        1 1/3 cups skim milk
Optional:
·        1 tsp. cinnamon
·        ½ tsp. nutmeg

Spoon in:
·        16 oz. fat-free cottage cheese
·        16 oz. farmers cheese or skim ricotta cheese
·        4 oz. no fat sour cream

Set aside.
Cook 12 oz. medium noodles (I use noodles without yolks) for 8 minutes. Drain. Rinse. Toss with a few tablespoons of margarine. Add to egg, cheese and milk mixture. Pour into an ungreased 9 x13-inch glass or ceramic pan. Bake at 350° for 1¼ hours. Remove from oven and sprinkle with topping (optional).

Topping (optional);
·        1 cup crushed cornflakes
·        ½ tsp. vanilla
·        1tbsp. sugar
·        2tbsp. melted margarine
·        ½ cup raisins

Sunday, January 30, 2011

Chocolate Chip Cookies and Chocolate Marshmallow Bark

Kent boasts not one, but two chocolate shops. It seems, therefore, fitting that Kent is the home of a Chocolate Fest. For 16 years, the Kent Center School Scholarship Fund Committee has hosted this annual event, which features home-made chocolate delights, all baked by local residents.
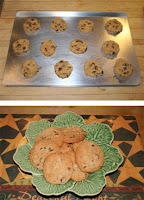
Top: Ready to bake; bottom: Ready to eat!

Since its inception, the committee has distributed a total of $923,160 to deserving students attending post-secondary vocational and technical schools and four-year colleges. The Chocolate Fest this year will be held Wednesday, Feb. 9, (snow date Feb. 10) from 3:30-5:30 p.m. at the school (9 Judd Avenue). I love working at the Chocolate Fest, seeing the children as they pass by the tables of goodies. Nobody leaves this event without a smile on his face.
          If you would like to attend the Kent Chocolate Fest, here’s how it works. Lovers of chocolate pay $5 at the door or present a pre-purchased ticket to receive a plate that they can then fill with a sampling of scrumptious home-made goodies prepared by local bakers. In previous years, the tables have overflowed with mouth-watering chocolate delectable delights.
          It should be noted that there is a no-nuts, no-peanut policy in place at the school. Kent Center School students provide handmade center pieces for the tables. Many sixth graders, who are potential scholarship recipients, volunteer their time at the Chocolate Fest. Local merchants and crafts people are on hand to sell seasonal gifts, as well. More than 30 volunteers make the event a special community effort.
          I am currently running a Saturday morning class called Cooking with Kids, organized by the Kent Memorial Library and held at Kent KitchenWorks. My students will be learning to make chocolate confections this week that they can contribute to the smorgasbord of offerings at the Fest.
          Because my wife, Leslie, is the baker in our family, I am turning over my column today to let her share with you two of her chocolate recipes. You can NEVER go wrong with chocolate. Enjoy.
          A word from Leslie: For some reason, I never became a cook but I always loved to bake. My earliest memories focus on baking cookies at Christmas with my Mom. We baked sugar cookies and chocolate chip cookies. Over the years, I have collected an endless number of recipes for chocolate chips and have finally one evolved that I will share with you here. I am also going to include a very quick and easy recipe for chocolate bark.

Leslie Levy’s Famous Chocolate Chip Cookies
Ingredients
·        2 cups all-purpose unbleached flour (I prefer King Arthur’s)
·        1 ¼ tsp baking soda
·        2 tsp. kosher salt
·        8 oz. (2 sticks—one sweet, one salted) butter, softened
·        1 1/3 cups packed light brown sugar
·        ¼ cup granulated sugar
·        2 large eggs at room temperature
·        1 tbsp. vanilla extract
·        3 cups chocolate chips (I love to mix different chips – usually I do 1½ cups Nestlés Semi Sweet chips with 1½ cups King Arthur Flour bitter sweet chips, but it’s OK to do 3 cups of Nestlés or whichever brand you favor)
·        2 cups chopped pecans and/or walnuts (These are optional. I like to mix them and literally pulverize them in an electric chopper)
Directions
1.     Preheat oven to 325°. (I use a small stand-alone electric convection oven, 20”w x 15”h x 13”d, made by Farberware. They’re hard to find.  We found our last one searching the internet. This oven is dedicated solely to my cookie baking and I set the temperature to 300°. One should note that a convection oven requires a lower temperature.)
2.     Combine flour, baking soda and salt (scoop and scrape tops of measured amounts with a straight edge to level). Whisk together and set aside.
3.     In a mixer fitted with the paddle (an electric hand mixer will work too), cream the butter until smooth and fluffy. Add brown and white sugars and mix until light and fluffy. Scrape sides of bowl.
4.     Add eggs, one at a time and beat. Scrape sides of bowl and mix thoroughly.
5.     Add flour mixture slowly, reserving about a half cup. Mix slowly on low speed. 
6.     Add pulverized nuts to the half cup of reserved flour and incorporate with whisk. (Remember, nuts are optional.) Add to mixing bowl and mix slowly. The batter will be dry and may not incorporate entirely at this point.
7.     Now add the vanilla, scrape sides and mix one last time. The vanilla provides enough moisture to incorporate all of the dried ingredients that remain on the bottom of bowl.
8.     Slowly add chocolate chips. You may have to finish mixing by hand because there are a lot of chips.
9.     Chill dough for half an hour.
10.   Using a small cookie scoop,* dip and scoop and level with back of rubber spatula and drop on cookie sheets.** Flatten slightly with fingers or the bottom of a glass. Bake until edges are golden brown. In a conventional oven, bake for 8-10 minutes. (In my convection oven, it takes 5-6 minutes.) I like my cookies to be slightly under done. Loosen cookies and remove to cooling rack.

* I use a cookie scoop by Farberware that measures 1½ inches in diameter. This yields a 3” cookie. In my search for the perfect scoop, I have acquired ones which measure 1-3/8”, 1-9/16” and 1-5/8”. I find the 1 ½” scoop to produce the perfect size cookie. You can find the Farberware cookie scoop on line on the Platzgraff website.
** I prefer using baking sheets which have a sealed air cushion. I find the cookies bake more evenly and are less likely to burn.

I hope you enjoy these cookies. They’re favorites of my husband, my grandchildren and niece, Grace.

Quick & Easy Chocolate Bark
Ingredients
·        8 oz. semi sweet or bitter sweet chocolate, either chips or bars that have been broken into smaller pieces (milk chocolate is an acceptable alternate)
·        2 tsp. butter
·        2 cups mini marshmallows
·        Optional ½ cup chopped nuts
·        Optional ½ cup dried fruit (craisins, apricots, etc.)
Directions
1.     In a double boiler, melt chocolate and butter, stirring occasionally.
2.     Remove from flame, set aside and let cool slightly.
3.     Line a 9 inch square pan with parchment paper or tin foil. Set aside.
4.     When chocolate has cooled a little, add mini marshmallows and mix gently and thoroughly. The combination of these ingredients is sufficient, but if you would like to add additional tastes and textures, you can incorporate chopped nuts and/or chopped dried fruit or crunchy cereal, such as Rice Krispies or Corn Flakes.
5.     Spoon mixture into the prepared pan. Smooth with spatula. Refrigerate at least 1-2 hours. Remove chilled chocolate from pan. Peel away parchment or foil. Use a knife to cut into bite size pieces.

 
Thanks to Rick for letting me share two of my favorite recipes.

Saturday, January 15, 2011

Pork Loin & Vegetable Roast

Now that most of our friends and I have reached the upper limits of middle age, i.e., lower limits of “older people,” cooking presents different obstacles and challenges me to be more creative.
Pork with rub on V rack over veggies
Take, for instance, this dinner I am planning for six friends this weekend. My wife, Leslie, is a member of WeightWatchers and does not care for red meat. One guest does not eat mushrooms or raw tomatoes; another has a cholesterol problem, while someone else does not eat fish. Whether it’s allergies, taste preferences or health and weight issues, it does pay to survey your guests before planning the meal to be sure everyone has something they will enjoy enough to ask for your recipe.
The following dish meets the criteria of my expected company and is relatively inexpensive, easy to cook and with preparation before hand, leaves you free to mingle with your guests.
First, I’d like to say a word about the meat. Today’s pork is very different than it used to be. The livestock is bred to be leaner and more tender, thanks to a modern diet of grain supplemented with vitamins, protein and minerals. They are brought to market at a younger age before they have a chance to develop fat. While this meat is healthier, it presents problems because most of the fat is gone and the meat can dry out during the cooking process, resulting in a tough and tasteless dish.
Brining restores some of this moistness and taste, allowing a shorter cooking time and a tastier dish. (I want to touch on brining. I find that brining my chicken, turkey, pork and even some extra large shrimp makes a BIG difference in the end results.)
Also, pork used to be cooked to a temperature of 170°-185°, but today’s pork should cook to a range of 150°-160°, yielding a juicy, tender, slightly pink meat. These brining instructions are for pork roasts only. Brining times for other cuts of meat will vary.

Ingredients for the brine
·        1 gallon water
·        2 cups kosher salt
·        2 cups sugar
(Rick’s Tricks: you can add 7-8 whole peppercorns, a bay leaf, cloves or other spices.) For one-half gallon of water, use one cup salt and sugar, each. Submerge the meat entirely, cover and brine (let sit) for 12 to 18 hours in the refrigerator. Rinse twice before cooking. Dry with paper towels and do not salt any further.
(Rick's Tricks: 1. If you’re short on time, double the amount of salt and reduce the brining time in half; 2. To determine the amount of water needed, submerge meat in cold water, remove meat, and measure the water. Add or reduce salt proportionately. Use a heavy plate to keep the meat submerged.)

Ingredients for Pork & Vegetables
·        3 tsp. sugar
·        1 tbsp. rosemary leaves
·        3 tsp. fresh ground pepper, divided
·        ¼ tsp. ground cayenne pepper
·        6 cloves garlic, coarsely chopped
·        1 pork loin roast, 3 lbs., trussed
·        2 onions, peeled and quartered
·        3 zucchini, sliced in half-inch pieces
·        3 carrots, peeled and cut into half-inch chunks (or just use a small package of baby carrots)
·        2-3 medium red potatoes, quartered
·        1 lb. parsnips, peeled, trimmed, cut into one-inch slices
·        1 cup pesto (I buy mine at Costco, great value)
·        1 tbsp. grape seed oil (Note: can substitute with EVOO but use a bit more)
·        ½ to 1 cup dry white wine
·        ¾ to 1 cup chicken stock
·        3 tbsp. sweet butter
1. Mash first five ingredients (sugar, rosemary leaves, pepper, cayenne pepper and cloves) into a thick paste. (I use my grandmother’s brass mortar and pestle) and rub the solution evenly over the pork.
2. Toss prepared vegetables in bottom of a large roasting pan with pesto, oil, wine, chicken stock and add a tsp. of salt and pepper. Toss veggies thoroughly.
3. Place pork on a v-rack over the veggies and place in a preheated oven at 425° for 30 minutes.
4. Turn roast over, reduce heat to 325°. Continue to roast for another hour, basting a few times.
5. When the internal temperature of the pork reaches 145°, remove roasting pan from the oven, tent with tin foil and let it rest for 10 minutes. The internal temperature will continue to rise.
6. Remove veggies to platter and tent them with foil, as well.
7. Place roasting pan over stove on medium-high heat. Add more wine and stock, if needed. Reduce liquids slightly until thickened and then whisk in butter.
8. Slice pork on an angle and serve with the veggies and sauce.

A little pre-planning makes for happier guests. Get ready for accolades.